I've been having so much fun with my Project Life projects that I completely spaced posting anything. Anyone who knows me, knows that I am, by nature, a card enthusiast...NOT a scrapbooker. It's something that I've wanted to do for such a long time and I've done a few things here and there (alright, 2 pages to be exact...since I started Stampin' Up!...*cough*cough* 5-1/2 years ago). To me, it is so difficult to start scrapbooking. There are so many different variables.
When people would ask to see my scrapbook, these are the pages I'd show them. They'd say "Really? That's all you've got? But this is what you do! This is, like, your job." Then I'd go into the "See, everyone has to start somewhere." talks. I was talking to my Dad one day and describing these pages. One is my Husband and I when we were first dating (WAAAYYYY back when) and one of my son and his pre-school class; and my Dad, ever the optimist, says "Well at least one of them is from the current decade."
When people would ask to see my scrapbook, these are the pages I'd show them. They'd say "Really? That's all you've got? But this is what you do! This is, like, your job." Then I'd go into the "See, everyone has to start somewhere." talks. I was talking to my Dad one day and describing these pages. One is my Husband and I when we were first dating (WAAAYYYY back when) and one of my son and his pre-school class; and my Dad, ever the optimist, says "Well at least one of them is from the current decade."
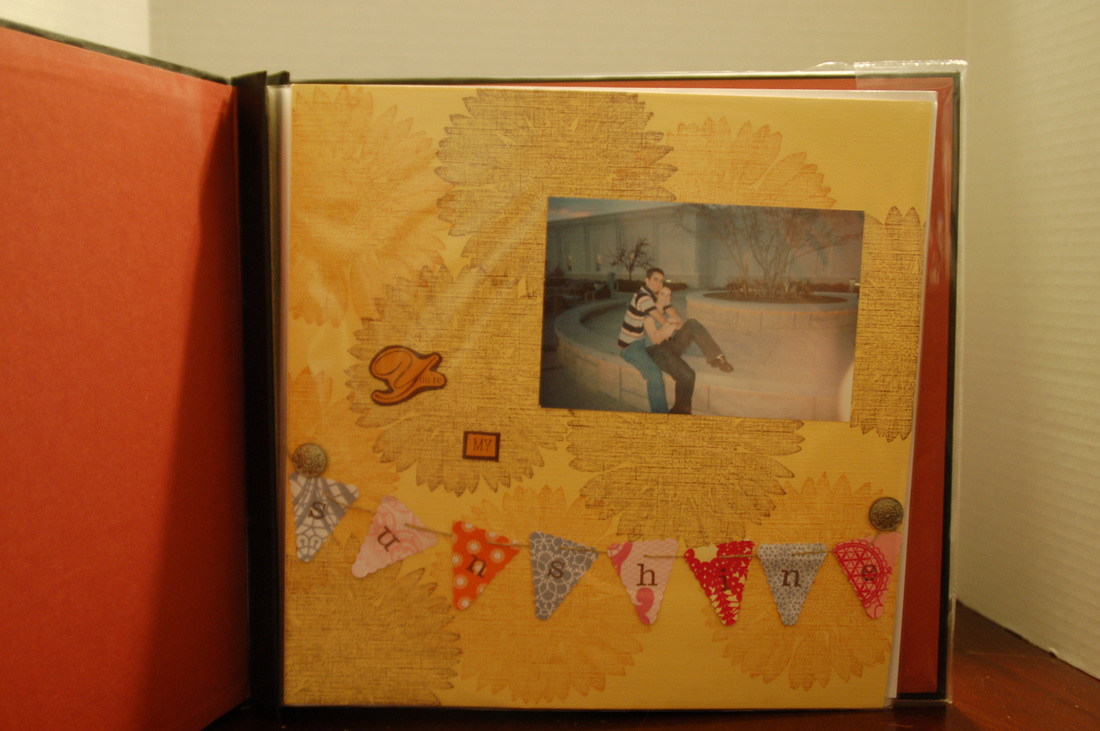
You're My Sunshine
This one was fun to do. Sadly, the Sunflower stamp I used for this one was retired this year. (It is still available as a digital download) You could always use a different flower for the background if you'd like to re-create this look (I personally think the Blended Bloom Stamp would beautiful. The pennants were made with the Petite Pennants Builder Punch.
I love doing this technique. I will have to do a tutorial on this sometime. Simply take whatever stamp you choose (can you tell how much I loved the sunflower stamp when I created these pages?) Stamp them in VersaMark Ink then cover with Clear Embossing Powder (If you'd like to REALLY make it pop use some colored Embossing Powder) Heat the embossing powder just until it melts with your heat tool (*Tip: heat your powder from the BACK of the page that way the pressure from the heat tool doesn't accidentally blow your Embossing Powder all over the place). The final step is to take your brayer and roll it over your ink pad (your choice of color) then roll the brayer over your scrapbook page, including over the flowers. After you have finished inking your paper, take a slightly damp paper towel and rub gently over the flowers. This will remove the almost all of the ink from the flowers to make them *pop*. This is called the "ink resist" technique that you can try with all sorts of stamp sets.
Why is scrapbooking so hard for me?
My kids are all adorable...but each one is adorable in their own unique way, so if one child did something, and another child did that exact same thing, I would choose 2 different designs, different colors, different accessories and possibly even different layouts altogether, to preserve the memory of each. With Project Life, it's simple to know where to start. The layouts are already there for you. All you have to do is print the pictures you'd like to have in your scrapbook and drop them in the pockets. Add a card or two for journaling (or just for decoration) and you're done. I personally prefer the Variety Pack 12" x 12" Project Life Photo Pocket Pages, but you can get Project Life 12" x 12" Photo Pocket Pages, the Project Life 6" x 8" Variety Pack Photo Pocket Pages, or go the old fashioned way (like I did for the "You're My Sunshine" and "Imagine the possibilities" pages and get the 12" x 12" Page Protectors.
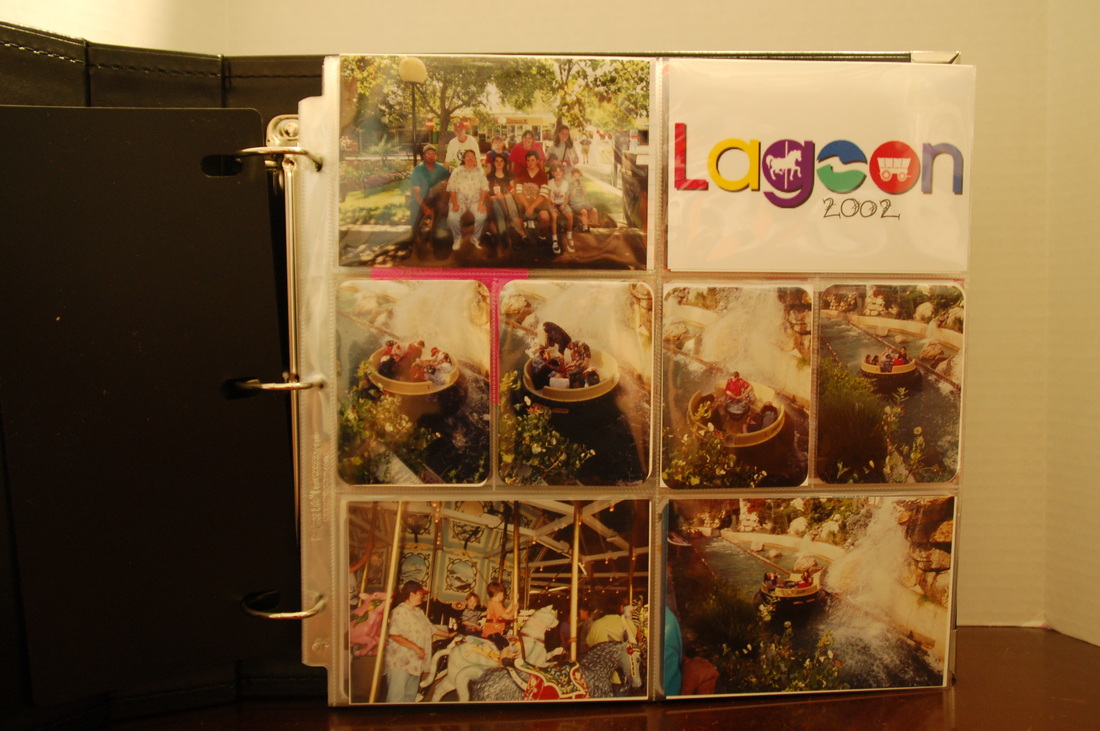
Here's the one I *FINALLY* did of our family vacation. (12 years ago)
Here's the one I *FINALLY* did of our family vacation. (12 years ago)
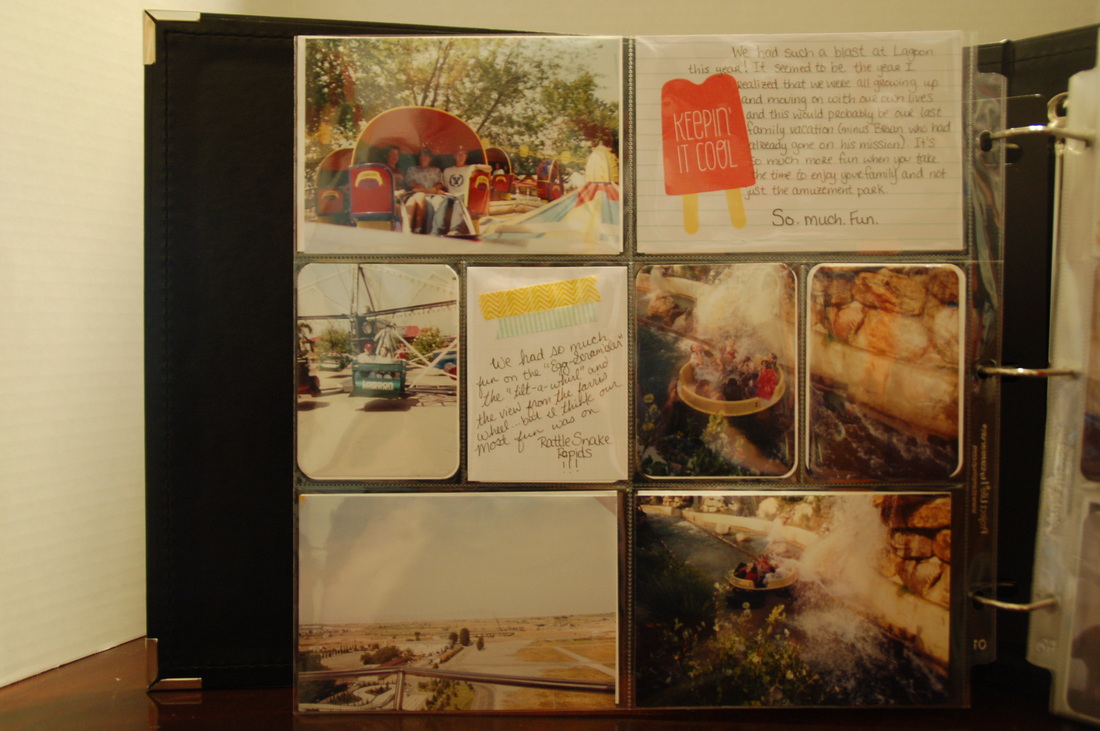
The "Keepin' it cool" insert came from the Project Life "Playground" card collection the other insert is a Project Life Grid Card with some "Beach House" Designer Washi Tape added to the top.
After finishing this, here are some suggestions I have:
#1: (This is by far the most important) Do your scrapbook pages as soon as possible after the event so you can remember dates, things that happened, how you felt that day, etc.
#2: If you ignored suggestion #1 (or just got a late start on scrapbooking) look for cues in the pictures to help remember dates and certain things that you'd like to include.
For this project I looked at the picture on the top left (top photo) where we had a group picture. I noticed a few things: 1) My oldest brother wasn't in the photo. When we had family vacations we ALWAYS had the whole family, so that must have meant he was already on his mission, so I had to call my brother and ask what years he was on his mission. I also noticed that I was holding a bear in that picture. I remembered my other brother winning that bear for me right around the time he graduated...so I made another call to find out when he graduated. Thankfully, I also had grouped all these photos together, and in one of the photos I didn't use for scrapbooking purposes, was a picture of my niece and nephew as babies (I had noticed they were also missing from the above picture), in the picture they were laying on their backs drinking from bottles, so I knew they had been born, but weren't old enough to come with us (this information together would have placed them around 1 year old). So I had to call my aunt and ask when they were born. After all the calling and texting and "detective work" I decided it would have been so much easier to just scrapbook it right away....or if I hadn't had time (or skill) to do this project RIGHT at that moment, at least stick a paper in with the photos that had dates, what rides we enjoyed the most, what was my favorite part about this family vacation, etc. it would have made life SO much simpler.
 RSS Feed
