Anyone who's been following me knows that we have been in the process of moving for almost 2 years now (seriously guys, this is getting REALLY old). My main problem is that since we were supposed to be moved into our new house toward the end of December 2015 we had all of our things put into storage so our house would show well. Unfortunately, that also meant that almost all of my crafting supplies are also packed, and have been for quite some time. I was trying to come up with some cards to show you all how adorable some of these Sale-A-Bration items and new Occasions Catalog items are. Then came the predicament: How do I showcase products to do them justice while only using my very limited crafting supplies? Time to get creative, I guess. Here's the list of the things I had to work with:
Basic Gray Cardstock
Pumpkin Pie Cardstock
Whisper White Cardstock
2016-2018 In Color Ink Pads
Project Life Cards & Labels
Custom Tee Bundle
Playful Palette Designer Washi Tape
Pop of Pink Designer Washi Tape
Pumpkin Pie Cardstock
Whisper White Cardstock
2016-2018 In Color Ink Pads
Project Life Cards & Labels
Custom Tee Bundle
Playful Palette Designer Washi Tape
Pop of Pink Designer Washi Tape
I also, had adhesive, but you'll have to admit, that's still a pretty short list to work with. I bought the Basic Gray and Pumpkin Pie Cardstocks as a Halloween Bundle and they look GREAT as Halloween items...but it's not Halloween anymore and I didn't want that look, so I didn't use the Pumpkin Pie for this one. I also didn't use the Pop of Pink Designer Washi Tape for these ones, but I'm going to on others because I *LOVE* the Pop of Pink series.
I'll be honest, the hardest part was trying to come up with something different using just 2 colors of cardstock. I don't know that I've tried that since I was a beginner that was just scared of doing anything besides really simple cards. These are 3 that I came up with and I think they turned out just great!
I'll be honest, the hardest part was trying to come up with something different using just 2 colors of cardstock. I don't know that I've tried that since I was a beginner that was just scared of doing anything besides really simple cards. These are 3 that I came up with and I think they turned out just great!


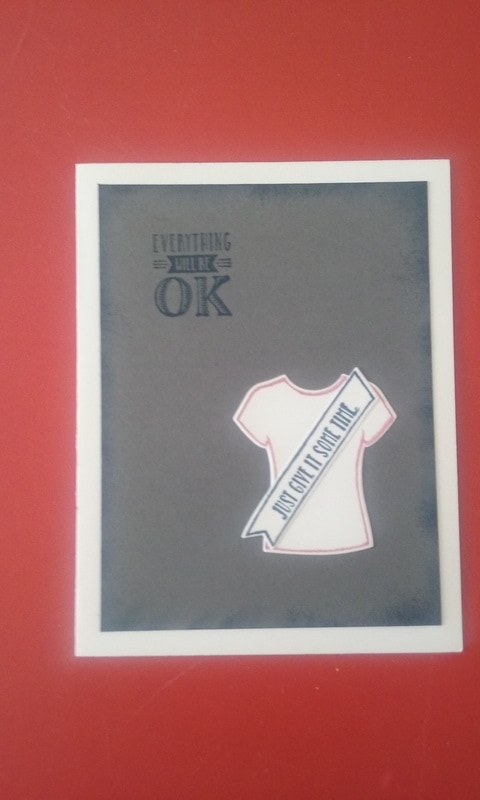
This "Everything will be okay" card is a simple one that would be easy to throw together for a friend that just needs a "Hey, everything will be okay" to get them through the day. I simply stamped the tee-shirt on Whisper White Cardstock in Sweet Sugar Plumb, cut it out using the cooresponding T-shirt Builder Framelits Die, stamped the banner in Dapper Denim then stamped "Just give it some Time" (this is from the 2017 exclusive Sale-A-Bration collection. This set is called "Designer Tee" Item #143359 free with any $50 order - pre-tax and shipping). I, then, cut a piece of Basic Gray for the card front, stamped "Everything will be okay" in the top corner using Dapper Denim ink, and put some "edging" ink around the card. I had to use a cotton ball...well 3 cotton balls because they are NOT made to do this kind of heavy-duty work. It took forever! Seriously, do yourself a favor and buy the sponges or sponge daubers. You'll thank yourself, I promise. Then I put the card front onto the Whisper White base and that was it.
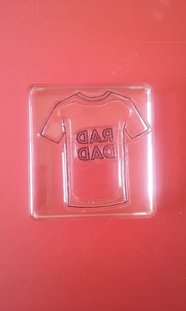
I'm not gonna lie. This "Rad Dad" is my favorite card (and probably the most simple one I made). I used the same Whisper White card base and the same Basic Gray card front as I did for the "Everything will be okay" card. I stamped the t-shirt and 'Rad Dad' in Dapper Denim - the stamps are made so that you can layer the setiment inside the t-shirt so you only have to stamp once...no lining up and hoping you get it centered. Then I cut it out with the corresponding framelit. I used 4 of the different washi tape designs from the Playful Pallette Designer Washi Tape for the background, then used some SNAIL Adhesive to adhere the t-shirt to the front. That's all there was to it.

See how easy Stampin' Up! makes it to layer the sentiment inside the t-shirt so you don't have to do any more lining up stamps perfectly?These are 2 different stamps. The "tee-shirt" is a stamp and the "Rad Dad" is a separate stamp. Wasn't that was so nice of them to think of?
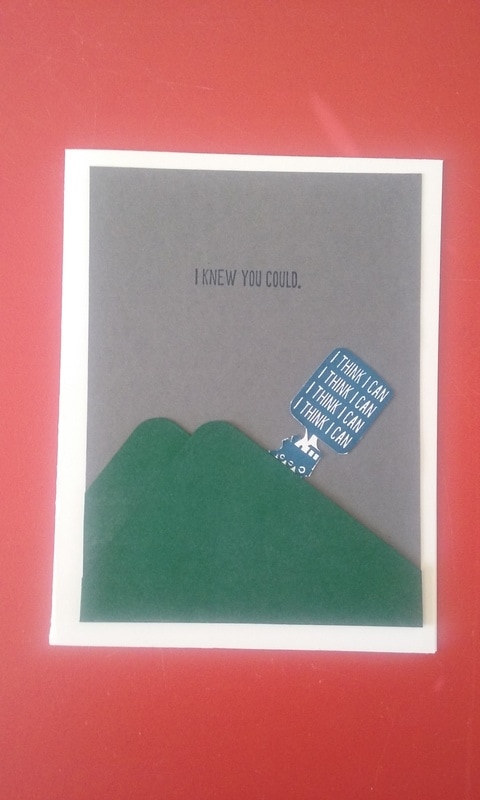
This last one was so fun to do (mostly because I had to get creative). I wanted my train to be rolling down some train tracks, but since I had very limited options, I couldn't think of anyway to make train tracks that looked good. Then I thought "a hill would be great...what could I use for a hill?" Then it occurred to me - I did have my Project Life Cards & Labels Framelits. Cut that in 1/2 diagonally, and turn it at an angle and then...I have hills. I had to do a little further problem solving. If you'll notice up in the list of supplies I had to work with there is no green cardstock of any shade. I have white - I could do "snowy mountains" I guess; but that would blend in with the card base. I don't want to do that. I could use the Pumpkin Pie Cardstock - but orange mountains? What can I do with orange mountains? Alright, no orange. I have Basic Gray Cardstock. A gray mountain? (With a gray card front on top of that). I can't do a gray mountain. Well, great. I'm out of options. I kept staring at this card that ALMOST worked, until it hit me. I may not have green cardstock, but I do have some Emerald Envy Ink. I decided to try it, and it worked! I cut out the 2nd to largest rectangle from the Project Life Cards & Labels framelits, cut it in 1/2 diagonally and then "pounced" my ink pad on top of my new hills. (Make sure to go in many different directions when doing this, otherwise you'll have very streaky lines going straight up and down your hills and it doesn't look very good. I'm speaking from experience here).
I stamped the train in Dapper Denim then cut it out, stamped "I knew you could" top center on the card front. Then glued it all together. The stamps from this one are also from the "Designer Tee" Sale-A-Bration set.
I stamped the train in Dapper Denim then cut it out, stamped "I knew you could" top center on the card front. Then glued it all together. The stamps from this one are also from the "Designer Tee" Sale-A-Bration set.

 RSS Feed
